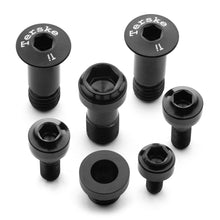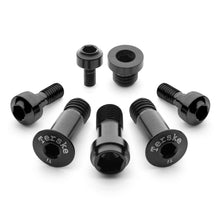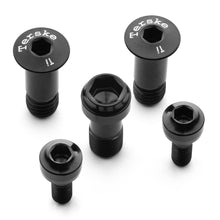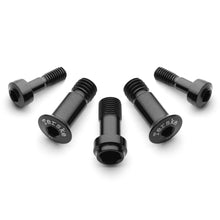
Cool Derailleurs.
Cooler Hardware.
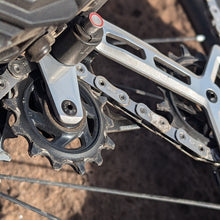
Coordinating beautifully with our extensive line of titanium hardware kits, Terske's new SRAM Transmission Hardware Kits replace the stock pulley bolts, body hardware, and pod clamp screw in your T-Type rear derailleur. Up to 45% lighter and infinitely better looking than stock.
In addition, we unify the derailleur hardware with precision 2.5mm hex fittings (standard for derailleur pulley hardware and matching our ultra-low profile bottle cage bolts) and pod clamps with 4mm hex fittings to match most modern cockpit hardware.
How about those weight savings?
| Transmission X | Transmission G |
5.0g for a 7-piece set:
|
4.5g for a 5-piece set:
|
Compatibility:
Each kit is designed with our own hardware to fit specific SRAM T-Type (Transmission) rear derailleurs.
Expand for a list of compatible models.
| Derailleur Model | Part Number | Kit Version | Contains |
| XX Eagle T-Type | RD-XX-E-B1 | Transmission X |
|
| X0 Eagle T-Type | RD-X0-E-B1 | ||
| GX Eagle T-Type | RD-GX-E-B1 | Transmission G |
|
- Model names are marked on the outside of the derailleur.
- Rear Derailleur part numbers are located on the back side of the rear derailleur.
- All T-Type rear derailleurs are marked "T-Type" on the back of the inner cage plate.
Installation:
Important!
Derailleurs are pretty important when it comes to getting you out of the woods. Improper installation and maintenance can result in a long walk or -worse- serious injury.
Expand for detailed installation instructions
If you're not familiar with derailleur adjustment or function please take this kit to your local shop for installation. If you are confident and have the following tools and supplies go for it!
Tools & Supplies Required:
- Calibrated torque wrench
- 2mm hex key
- 2.5mm hex key
- T25 Torx key
- 2.5mm bit for torque wrench
- 4mm bit for torque wrench
- Liquid purple (Loctite 222) or blue (Loctite 242) threadlocker
- Nickel anti-sieze compound
Installation:
- Shift derailleur to fourth or fifth cog
- Remove battery from derailleur and install battery cover
-
Strongly recommended:
- Remove derailleur from frame
- Remove cage from body by spinning clockwise when viewed from outside
- Apply coating of anti-seize compound to threads of pod clamp bolt
- Apply drop of threadlocker to coat threads of each remaining titanium bolt
Not pod clamp bolt- that already has anti-seize on the threads.
- Use T25 Torx wrench to remove pulley wheel bolts
- Install titanium pulley wheel bolts and torque to 3Nm
- Use 2.5mm hex wrench to remove two bolts from knuckles from underside of outside parallelogram.
Nylon B-knuckle cover will be loose but should remain in place. - Use 2.5mm hex to replace knuckle bolts with same-size titanium bolts and torque to 2Nm
- Transmission X only:
- Use 2mm hex wrench to remove small button housing bolt from below AXS button
- Use 2.5mm hex wrench to install same-size titanium button housing bolt and torque to 0.2Nm (that's right: zero point two Newton-meters).
- From back side of derailleur insert 2.5mm hex wrench into rotation stop below main pivot and remove by turning clockwise (away from back side)
- Use 2.5mm hex to replace rotation stop with titanium version.
If accessible from outside of derailleur (XX) torque to 3Nm.
If inaccessible (X0), tighten from back side counterclockwise until hand tight.
- Use T25 Torx wrench to remove pinch bolt from AXS Pod Controller handlebar clamp.
- Use 4mm hex to install titanium pod clamp bolt and position AXS Pod Controller as desired.
Torque pod clamp bolt to torque indicated on clamp. - Reinstall derailleur and chain in accordance with manufacturer instructions.
- Reinstall battery and check function and adjustment before riding.
As always,
Trademarks are property of their respective owners. Compatibility statements from Terske are not endorsements by trademark holders.


